

How to add robots.txt and sitemaps to Next.js

For a site to be SEO friendly, it should be:
- Fast
- Have proper meta (title, description)
- Content rendered on initial request
- robots.txt file
- XML Sitemap
Next.JS makes it really simple to a build sites with NodeJS, and React with server side rendering.
It covers the first 3 bullets on the list above, without you even having to think about it.
But what about the last 2 bullets? Yea, those are a bit tricky to find a solution for. Even scouring through Google can be hard to find a good answer.
Add robots.txt file in Next.JS
A robots.txt file, is a text file that lets web crawlers know how to crawl your website. This file is extremely important for search engines, and for small and big sites.
If you want a more in depth explanation on this file, visit Moz’s webpage on robots.txt.
Google demands the URL for this file to be in the root of the domain. e.g. – https://linguinecode.com/robots.txt.
In older versions of Next, you had to create a server.js file and create a new path, that points to the robots.txt file. But not in the latest version!
In the latest version of Next.JS you can add your robots.txt file inside a directory called public.
The public directory is meant to be a replacement of the static directory.
Anything inside the public directory will be exposed in the root domain level.
So it the URL for the robots.txt file WOULD NOT be /public/robots.txt. but it WOULD BE /robots.txt.
That will satisfy Google requirements.
Add a XML sitemap in /api directory
Sitemaps are also another form to let search engines, such as Google, crawl through your site more effectively.
The URL pattern doesn’t need to be specific on this one like the robots.txt file.
So, if that’s the case, you can use the /api directory in Next.JS to create a sitemap in Node.JS.
Let’s see how I achieve this solution.
First I’ll create a file inside /pages/api/ and call it posts-sitemap.js.
Now, I use a node module called sitemap to help me build an XML sitemap via Node.
import { SitemapStream, streamToPromise } from 'sitemap';

export default async (req, res) => {
  try {
    const smStream = new SitemapStream({
      hostname: `https://${req.headers.host}`,
      cacheTime: 600000,
    });

    // List of posts
    const posts = [];

    // Create each URL row
    posts.forEach(post => {
      smStream.write({
        url: `/post/${post.slug}`,
        changefreq: 'daily',
        priority: 0.9
      });
    });

    // End sitemap stream
    smStream.end();

    // XML sitemap string
    const sitemapOutput = (await streamToPromise(smStream)).toString();

    // Change headers
    res.writeHead(200, {
      'Content-Type': 'application/xml'
    });

    // Display output to user
    res.end(sitemapOutput);
  } catch(e) {
    console.log(e)
    res.send(JSON.stringify(e))
  }

}
Add your XML sitemap to robots.txt
Now that you have your sitemap, and robots.txt, let’s complete the full circle.
Go to your robots.txt file and add your new sitemap to the list.
Sitemap: https://domain.com/api/posts-sitemap

User-agent: *
Allow: /*

Disallow: /api/*
Validate your robots.txt file
To validate your robots.txt file, go ahead to the Google Search robots.txt tester.
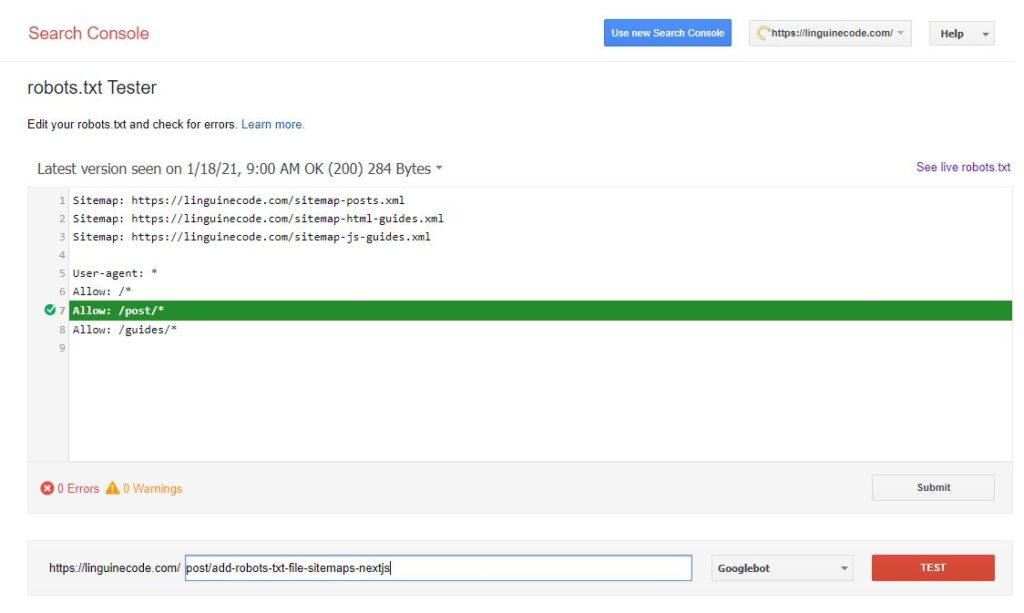
You can test a URL on your site and see if it matches one of your rules.
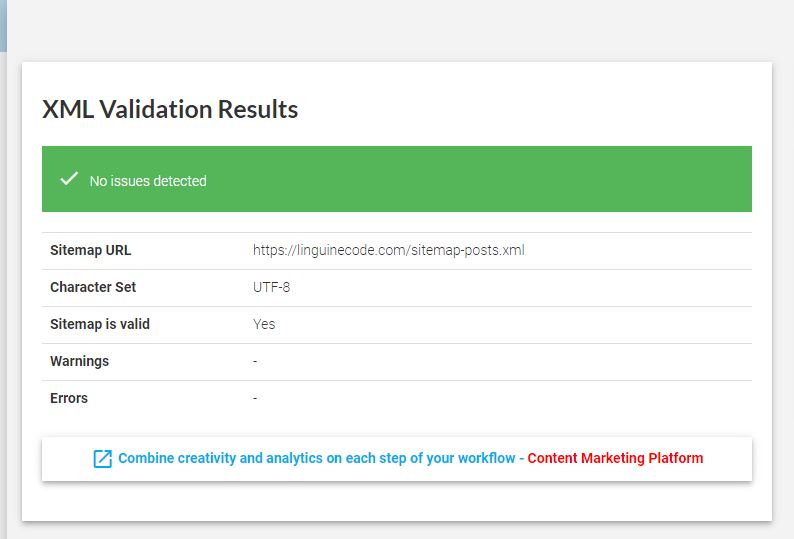
Validate XML sitemap
To validate your Sitemap XML, go ahead and test on XML-sitemap.com.
Happy coding!
I like to tweet about NextJS and post helpful code snippets. Follow me there if you would like some too!
