

How to successfully install Java (JVM) in less than 5 minutes
Looking to install the latest Java version to get started with Java development in your machine?
This article will give you a step-by-step process.
1. Go to the Java homepage (www.java.com)
Go to the www.java.com. Once you’ve reach the homepage click on their download button.

Or you can go straight to the download page, “Download Java Page“.
2. Agree to Java license and download
Once you’ve reached the download page on the Java site, you’ll want to agree to their terms and service and click “Agree and Start Free Download” button.
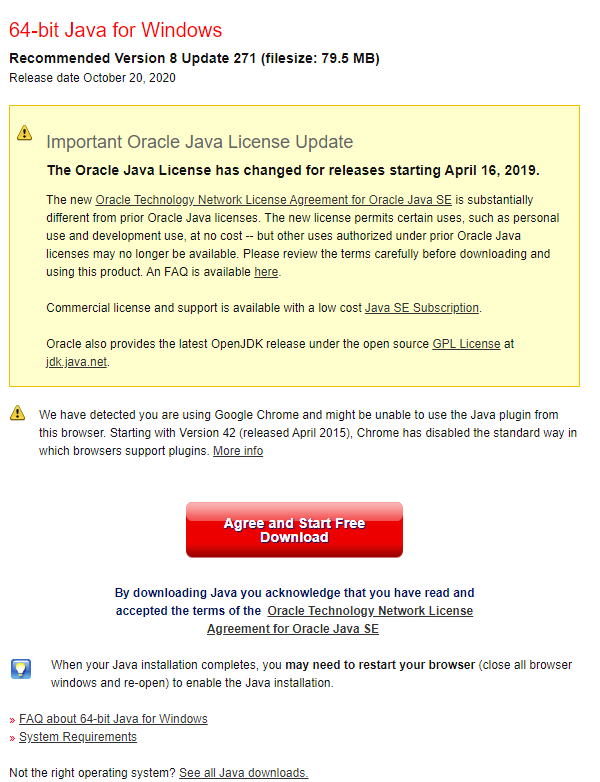
System requirements
You can always select the system requirements link to see if your machine meets their requirement.
Here’s the brief overview of their requirements:
- 79.5MB of free storage
- 64-bit Windows 10
- 64-bit Windows 8.x Desktop
- 64-bit Windows 7
- 64-bit Windows Vista SP2
- 64-bit Windows Server 2008 SP1
- 64-bit Windows Server 2012 and 2012 R2
Once you’ve clicked the button, you’ll see the download executable file appear on the bottom left of the browser.
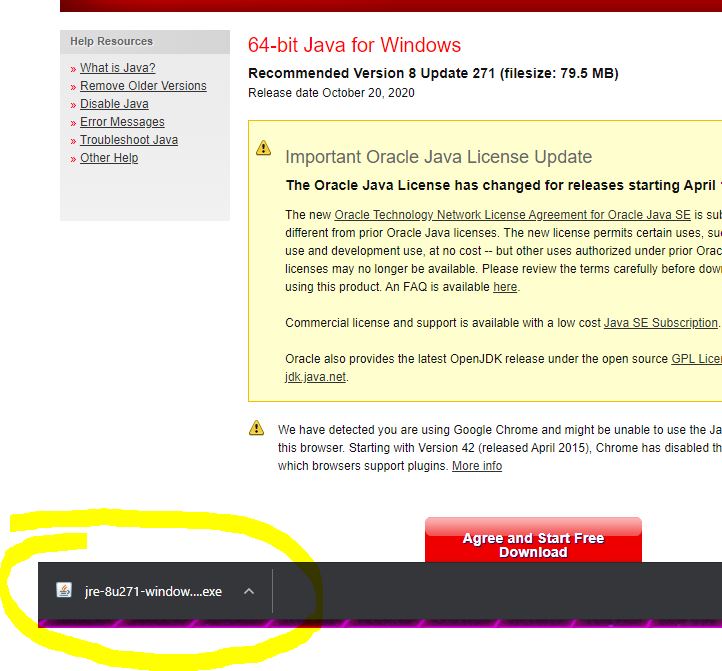
Go ahead and click that when it’s done downloading. You may get a prompt message asking for permission to run. Go ahead and give it permission.
3. Run the Java Setup wizard
Once you’ve given permission the Java Setup window will appear.

Go ahead and click Install. If you want to change the destination of your Java install select the checkbox on the bottom left.
You will see the installation progress, then the complete message if everything went correctly.
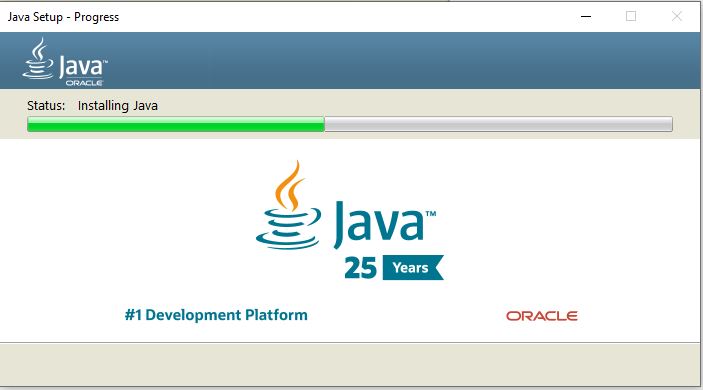
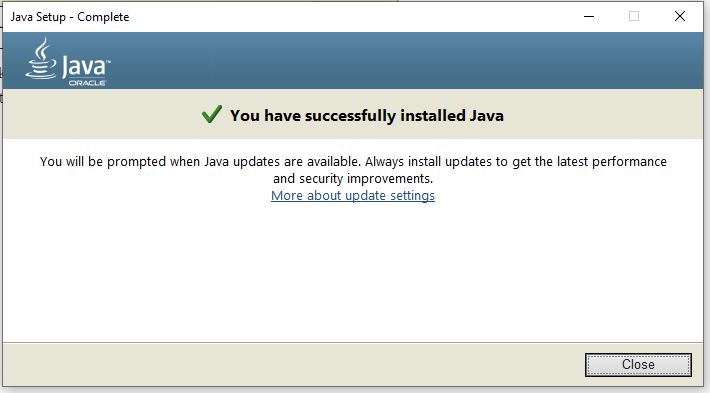
Go ahead and click Close.
4. Check Java version
Open up your command prompt and type the following command
java -version
You should see a similar output like this:
java version "1.8.0_271"
Java(TM) SE Runtime Environment (build 1.8.0_271-b09)
Java HotSpot(TM) 64-Bit Server VM (build 25.271-b09, mixed mode)
Windows WSL with Homebrew
If you’re using WSL, you may have homebrew installed. This method also works for Mac OS users.
Here are the following command with homebrew:
brew update
brew install java
java - v
Uninstall Java
To uninstall Java from your Windows machine follow step 1 – 3. When you’ve hit step 3, do NOT click “Install“. Instead click the “Remove” button.
I like to tweet about Blog and post helpful code snippets. Follow me there if you would like some too!
