

How to add a Webpack dev server proxy mock API
Is your project going to be a single page application?
And will there be a remote REST API that it will need to ping?
In this article I’m going to cover how to create a Webpack dev server proxy to emulate an endpoint for your React application to ping during local development.
If you haven’t setup your Webpack configuration for development, take a look at a recent article that covers how to do that. Setup React Webpack dev server environment.
What is a proxy server?
A proxy is nothing but a middleman that does the communicating from one computer to another (server).
They’re beneficial for increasing security, and increasing performance.
But for this case, we just want to use a Webpack proxy to simulate a server REST endpoint that is probably going to be in a remote server.
Adding Webpack proxy
If you’d like to follow along, go to this article to help you setup your React dev environment or go to the GitHub repo and download it.
module.exports = {

  // ... other configs

  devServer: {

    proxy: {
      '/api/bypass-example': {
        bypass: (req, res) => res.send({
          mssg: 'proxy server - Message came from bypass property in webpack'
        }),
      },
    },

  },

};
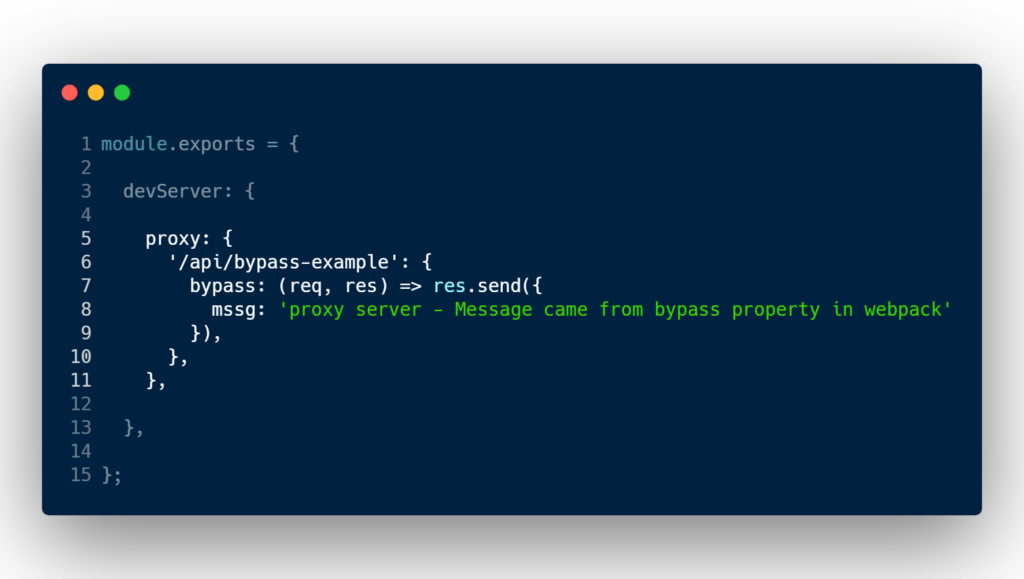
In my Webpack config file, I’ve added a property under the devServer property called, proxy.
The proxy property is another key value object. Every key in the proxy property represents a endpoint that is available for your React application to ping.
And the value to that key has a handful of other properties that it accepts, but in this example I’m going to use the bypass property.
The bypass property only accepts a function value.
That function value gives you access to the request, response, and proxy options.
The bypass function must return either false, a file to serve, or you may use the res.send() object to return a value.
In the example above I’ve added a key of /api/bypass-example, and it uses the bypass property.
I’m also using res.send() to throw a message back to my React application when it gets pinged.
Let’s create a simple React component that pings that endpoint on a componentDidMount hook.
P.S. I will be using React useEffect hook. If you’re not familiar with React useEffect, I highly recommend you to read this article.
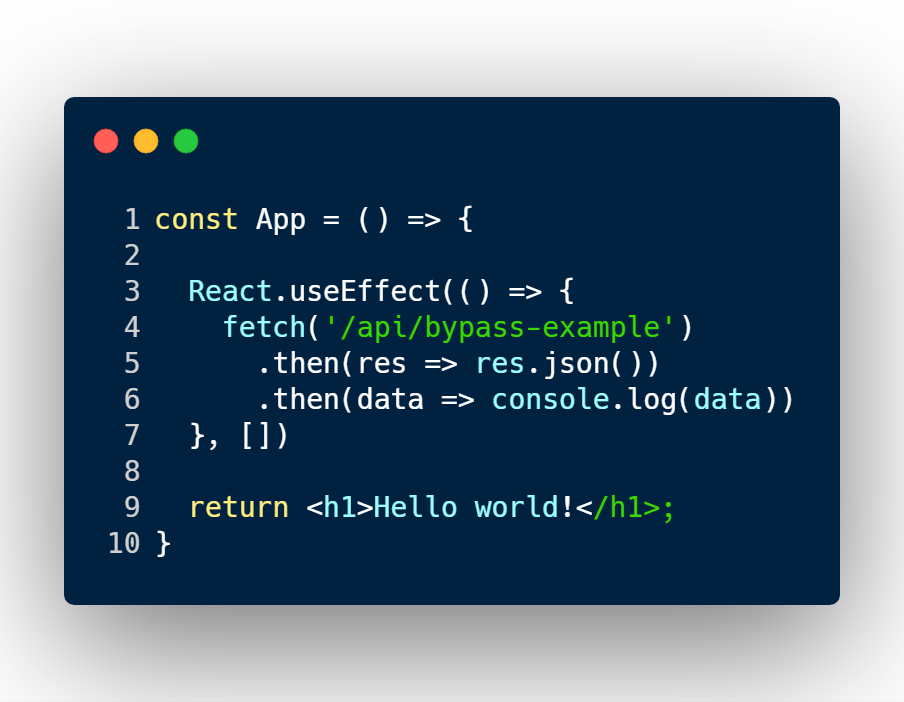
A fairly simple React component.
The only job it has is to hit the bypass-example endpoint that was created in the Webpack config file.
Let’s look at the output.
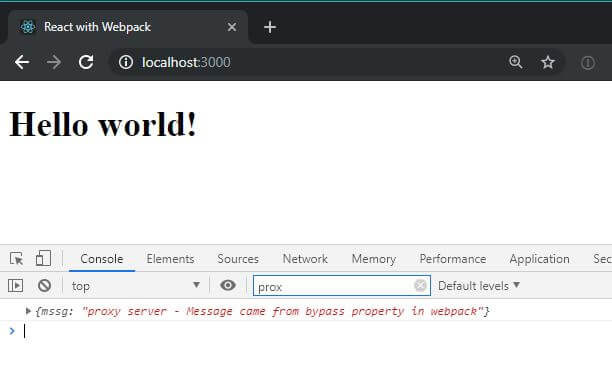
The call to /api/bypass-example was a success and returns the message I configured in the Webpack file!
Conclusion
Developing React applications now in days, usually means that the application is going to be a single page application.
And if that’s the case, that means there is going to be a remote server to act as a REST API.
Most of the time, an engineer will:
- Build a React feature
- Write code to get the correct endpoint depending on the environment (e.g– http://localhost:3001/api/v1/user or /api/v1/user)
- Create endpoint in the back-end
- Create endpoint business code logic
- Test
- Repeat
The goal for faster React development is to:
- Develop a React feature
- Call production endpoint. (e.g – /api/v1/user)
- Create a Webpack dev server proxy and return the mock data
- Rinse and repeat
All you need to do during front-end development is to worry about the data that is returning, and continue moving forward with your React development.
Once that is ironed out, build the back-end code to the specs that the front-end will need.
This will help you develop React applications faster by not worrying about building the back-end code right after a new feature.
I like to tweet about Webpack and post helpful code snippets. Follow me there if you would like some too!
