What is TypeScript and how to add it to React
Do you know that TypeScript has been rising in popularity?
It’s a programming language that many folks are adopting into their own personal and professional projects.
But why is it such a popular language to use? And is it easy to add?
In this article will go over what is TypeScript, and demonstrate in 5 easy steps how to add it to a React project.
What is dynamic typing?
JavaScript is a loosely type language; also known as a dynamic typed language?
A dynamic type language is a programming language that is flexible, and does type checking on run-time rather than compile time.
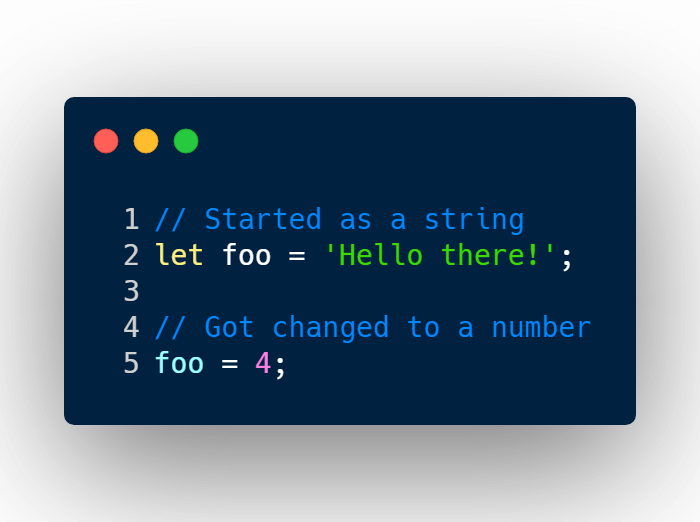
This means you can create a variable that starts out as string type, but then change it to a number type.
Or create a function that can return different value types.
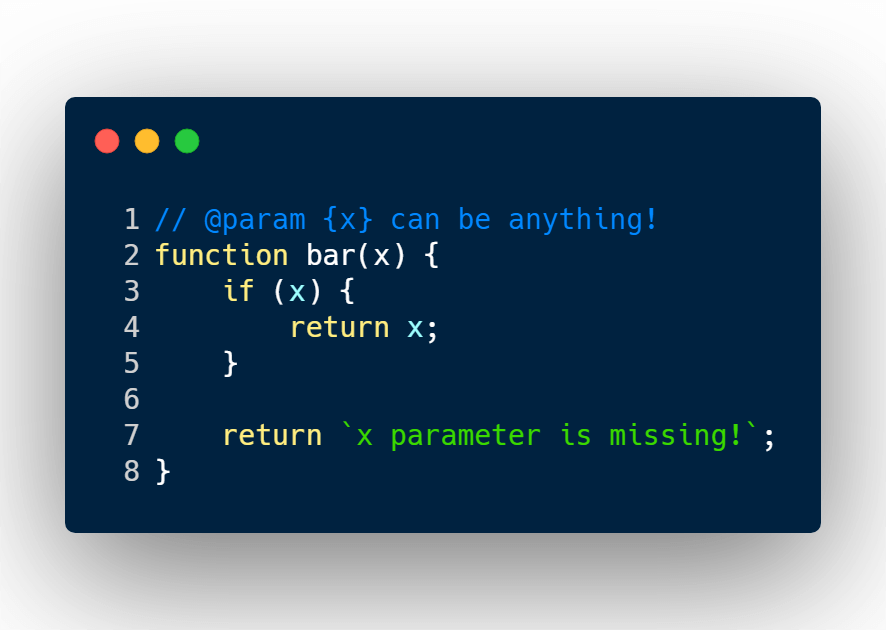
Deploy the JavaScript code to the browser, and it will work like magic.
This is a reason why many engineers love JavaScript, because of it’s flexibility, and speed of development that it provides.
Dynamic typing (JavaScript) vs static typing language (TypeScript)
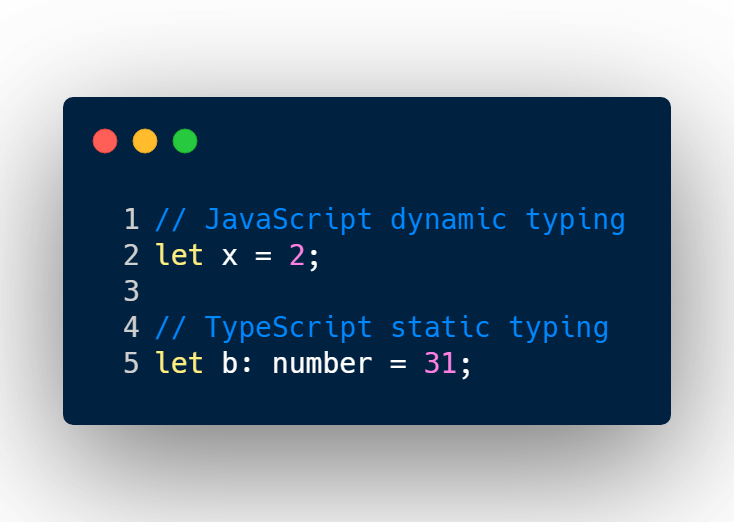
JavaScript biggest strength is its biggest weakness.
Now in days, full end-to-end applications are being built with JavaScript, because it may provide a user experience that back-end languages can’t.
This can only mean that a lot of JavaScript code (thousands of lines) has to be created, and maintained by engineers.
At the end of the day, humans are programming these applications, and human errors prone to happen.
Silly mistakes that should have been caught during development will be deployed to production, and may cause the entire application to blow up, and burn the company down (super exaggerated)!
A silly example is changing the value o the auth object into a boolean.
This is where static typing comes and saves the day.
Static typing makes sure you have defined a variable or an object with a primitive type value.
This ensures that if your variable started with a number, it stays a number.
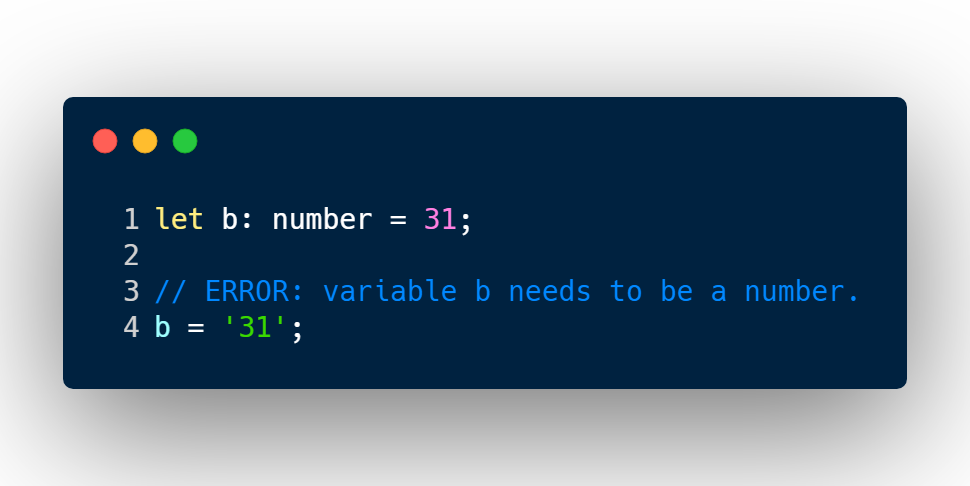
This is where TypeScript comes in handy.
What is TypeScript?
TypeScript is JavaScript with an extra layer that adds static typing tools and capabilities to your JavaScript code.
As you’re developing an application, you will be writing TypeScript code, which then gets compiled to plain JavaScript for the browser to understand.
The benefits of TypeScript is that it let’s you write robust software.
It’s provides features such as static typing for variables, interfaces, and types.
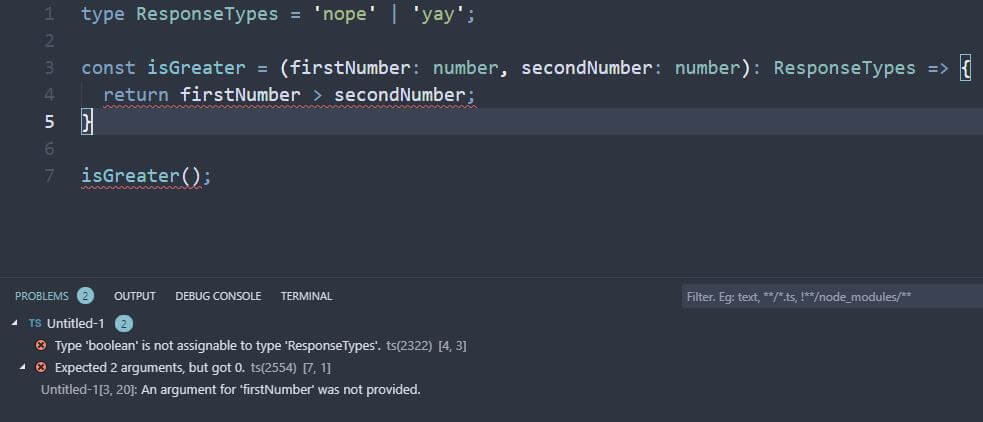
By using a rich IDE, you’ll be able to catch these problems before deploying to production.
In the example above, I’ve created a function that checks if the first number is greater than the second number, it will return yay or nope.
This function has been defined that it requires 2 arguments.
Both arguments, must be a number, and the function can only return yay or nay as value.
The first problem presented in my terminal was that the function is not returning yay or nope.
The second problem VS Code is telling me is that when I used the isGreater() function, I didn’t enter the required arguments.
With VS Code telling me the silly mistakes I’ve made, I can fix these bugs right away.
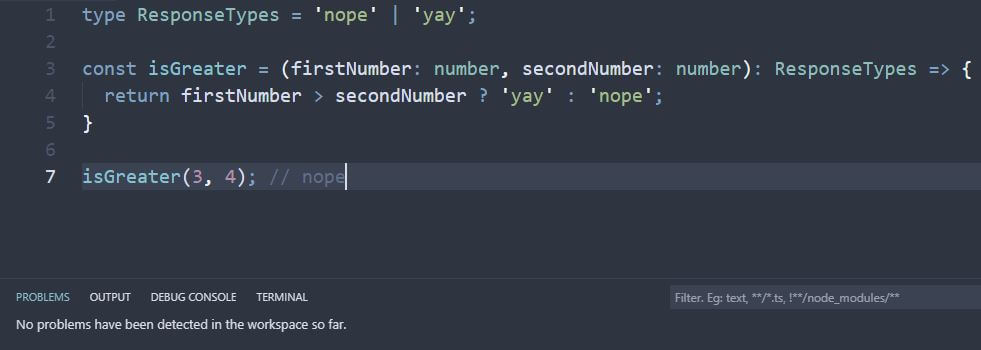
No errors!
Now that we know why TypeScript is awesome, let’s add it to a React project.
Step 1: Create package.json file and install dependencies
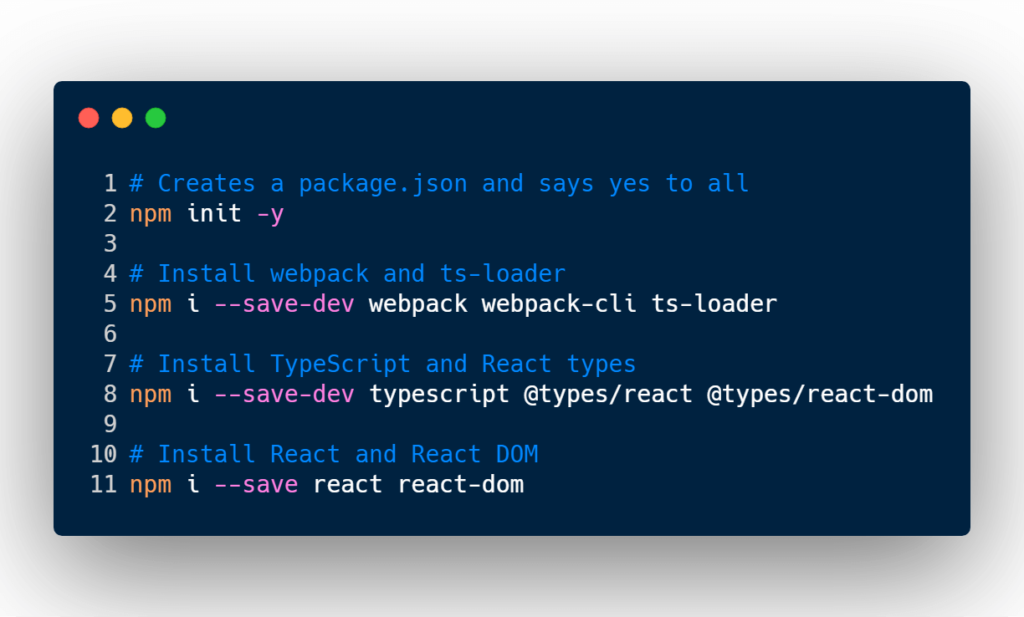
In your terminal, go into your project root directory, and type npm init -y.
That will generate a quick package.json file for you.
You’ll then have to install your dev dependencies.
On line 5, I’m installing Webpack, Webpack command line tool, and ts-loader (TypeScript loader).
The TypeScript loader will help Webpack compile, and translate TypeScript code into basic vanilla JavaScript.
On line 8, you will install a few more node module dev dependencies.
You will need to install TypeScript and the React types.
@types/react, and @types/react-dom have TypeScript definitions that will help TypeScript understand React a bit more.
The final node modules we need is our React, and React DOM modules. This will help you develop React code and dump onto an HTML file.
Step 2: Create your tsconfig.json file
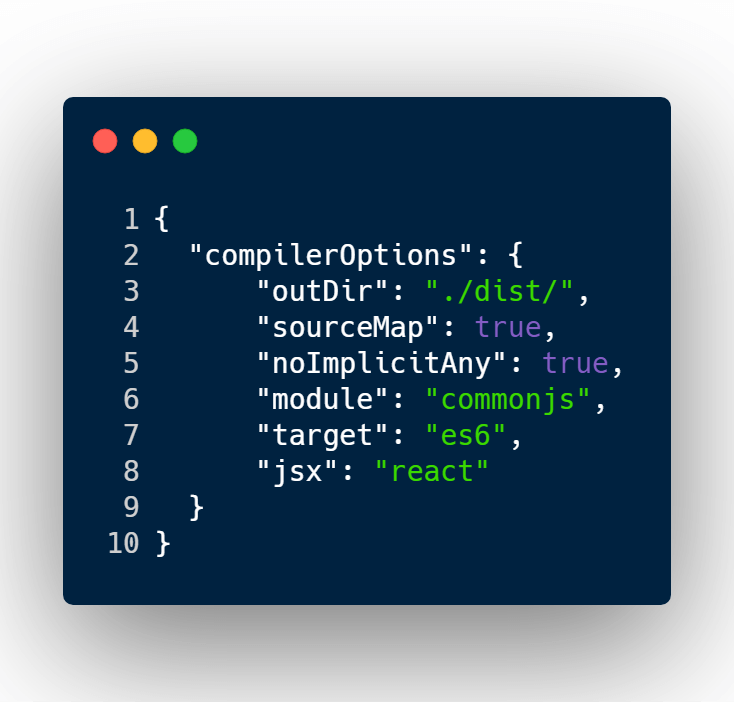
The tsconfig.json file is required for any TypeScript project.
The objective of this file is to tell TypeScript a few basic things, like where to output the destination file, and what EcmaScript version to use.
To read about the options, you may visit the document site.
Step 3: Create initial HTML file
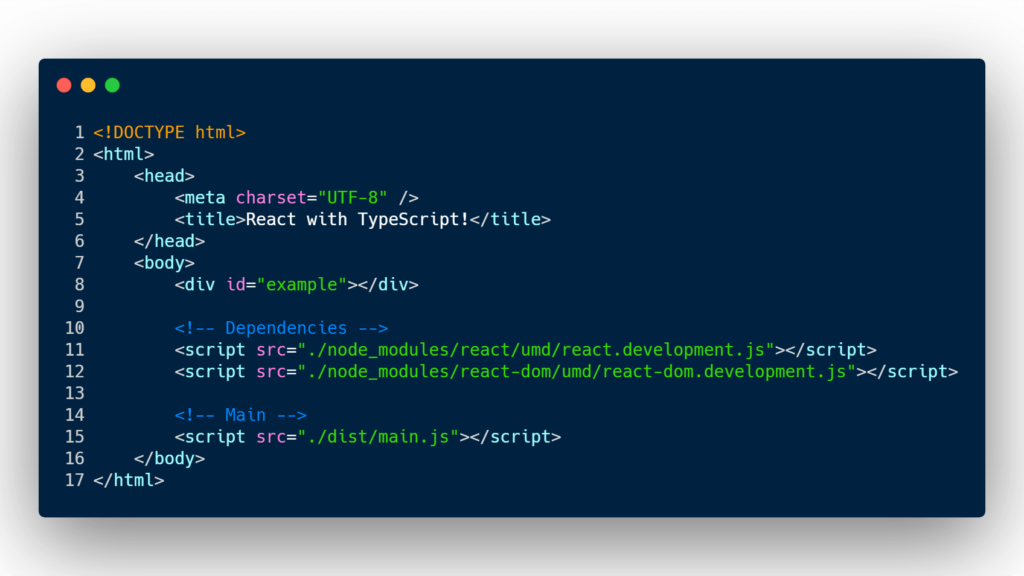
This will serve as our basic shell markup for the application.
I’ve added a div with an ID value of example.
This is the DOM node that React will attach itself too.
I’ve also few script tags to download some React dependencies, and the main JavaScript file output.
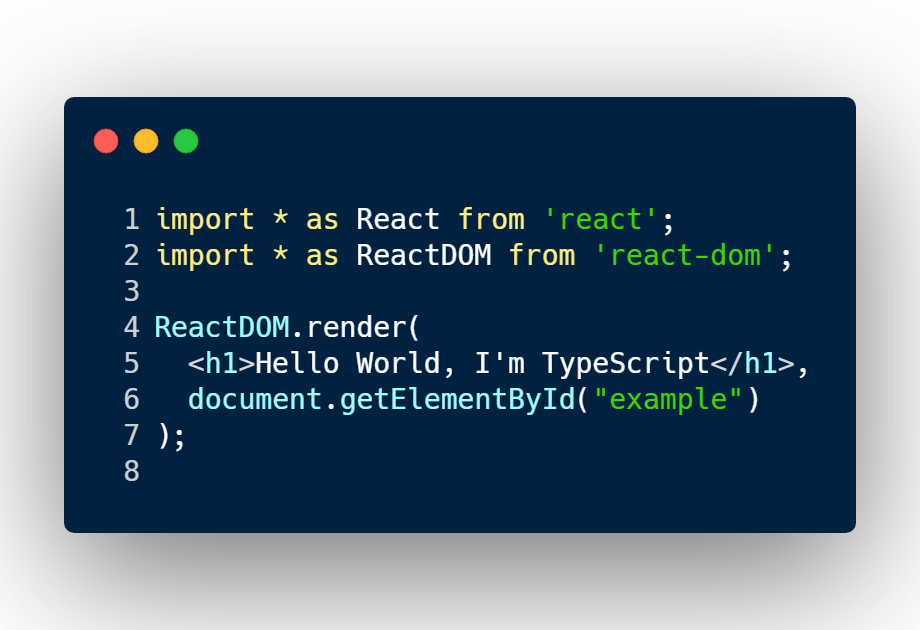
Step 4: Create Hello World React component
In the root of the project you will create a directory called src.
Inside the src directory, you will add a file called index.tsx.
.tsx is the file extension when you want to write JSX, and TypeScript code together.
Step 5: Create Webpack config file
If you’re not familiar with creating a Webpack, and React environment, go to one of our previous articles that explains in detail how to get started.
Article link: Setting up Webpack with React
But if you already know, let’s get started.
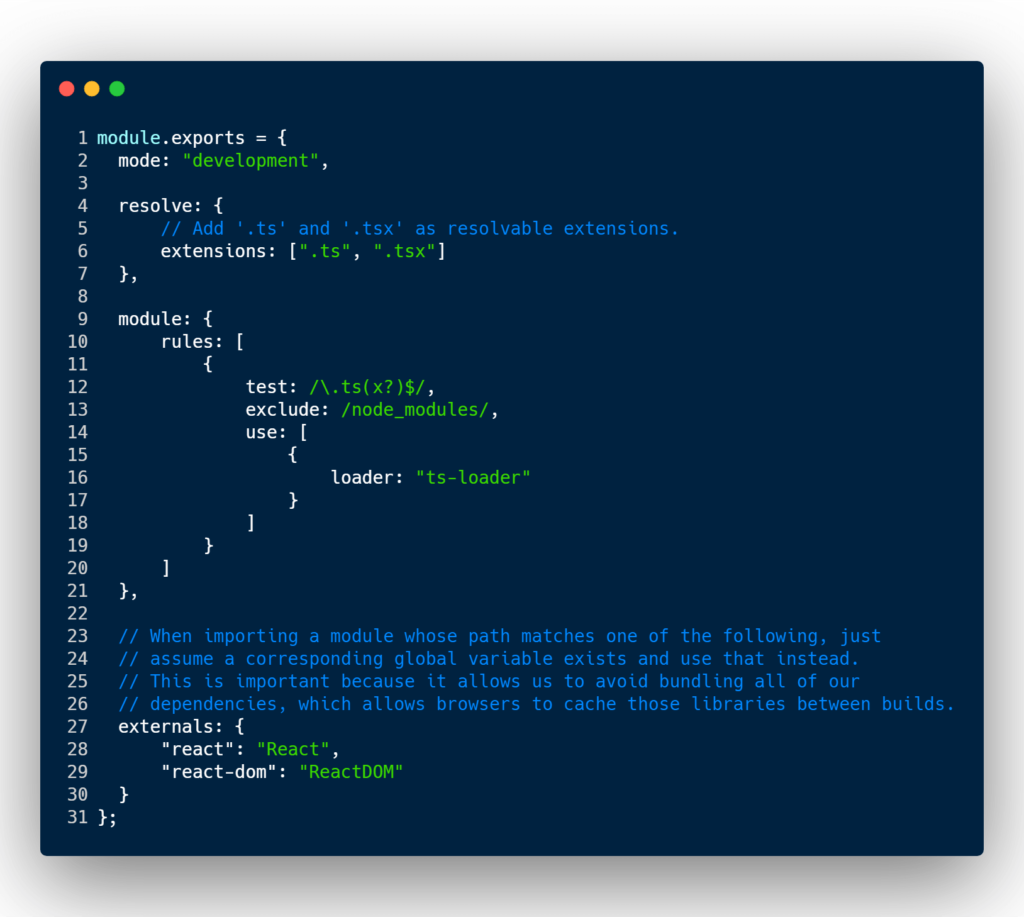
In line 6, I’m telling Webpack that .ts, and .tsx are file extensions that I’m going to use in this project.
.ts, and .tsx are TypeScript filename extensions.
In line 12 – 19, I’ve created a module rule. This rule is meant for .ts, and .tsx files only.
The rule is saying, that if Webpack comes across these files with those filename extension, please use the ts-loader module.
The ts-loader is a Webpack module that helps Webpack understand and compile TypeScript syntax.
Booting it up
Now that all is setup, and configured. You can run in your terminal:
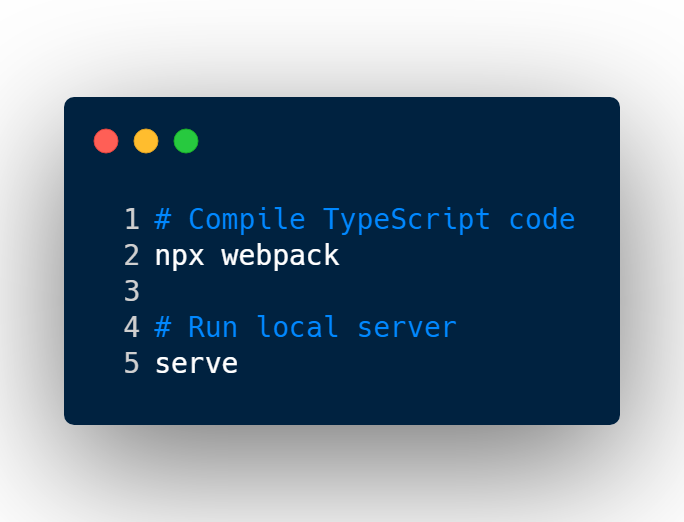
That command will compile your TypeScript code into plain JavaScript, and dump it into /dist/main.js.
The serve command will run a local server.
NPM Package for serve: Serve
Happy coding!
I like to tweet about TypeScript and post helpful code snippets. Follow me there if you would like some too!
