

React useRef and useLayoutEffect vs useEffect (Step-By-Step Case Study)
In a recent article, getting started with React useEffect, I discussed about how to replicate a component lifecycle (componentDidMount, componentDidUpdate, and componentWillUnmount) with the React useEffect hook.
Somewhere in your googling you’ve also might have heard of another React hook called useLayoutEffect.
And some where in the readings and searching it might say that it acts like React useEffect but to only use it when doing DOM mutation.
But what exactly does that look like?
In this article I will go over that, and will actually use another hook called useRef which ties in together nicely!
PS: If you’re not familiar with React hooks, take a look at this guide to catch you up to speed. Understanding what React hooks are and how they work.
When and how to React useLayoutEffect
The React useLayouEffect hook is written the same way as useEffect, and almost behaves the same way.
One of the key differences is that it gets executed right after a React component render lifecycle, and before useEffect gets triggered.
Let’s look at a piece of code.
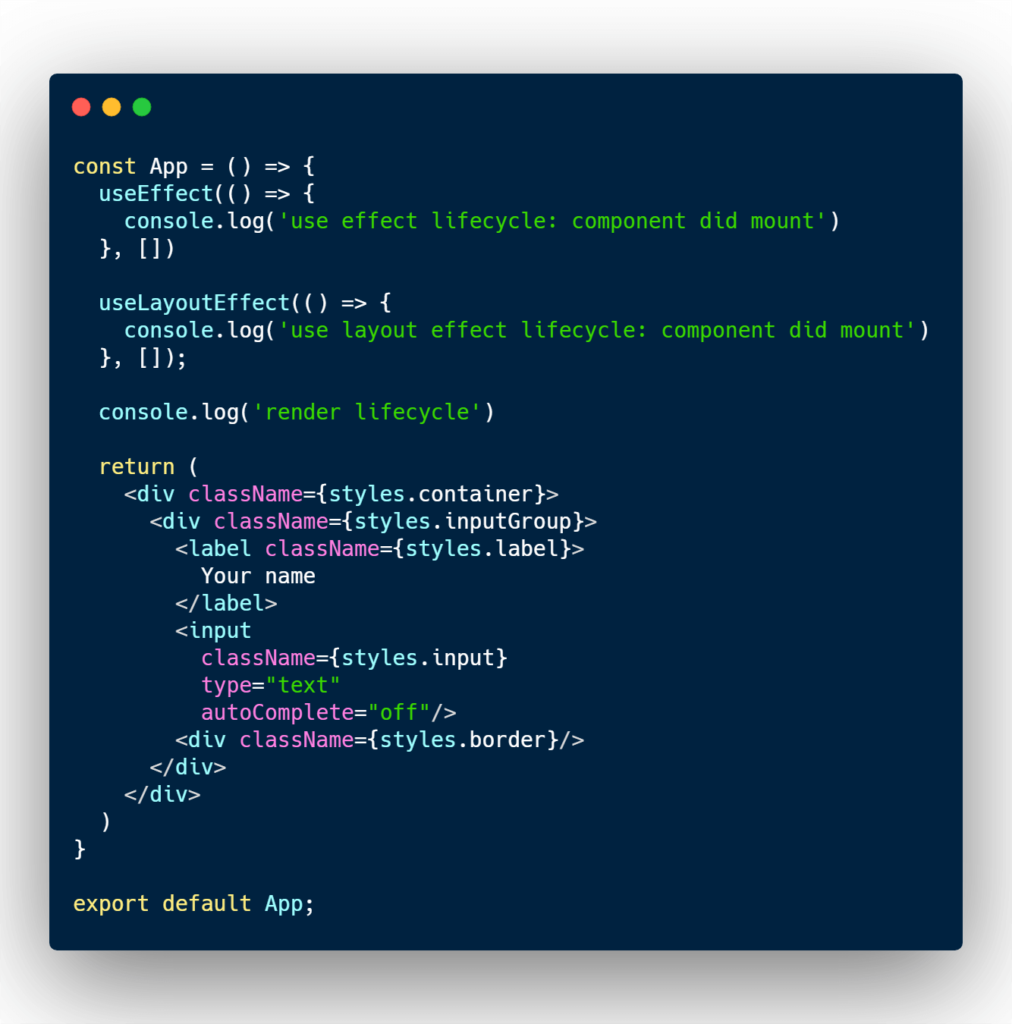
We have a small application that displays a few div’s, a label, and a input field.
Before the return statement I’ve added a couple console messages to see the order of those messages.
useLayoutEffect and useEffect are only being executed after a component did mount lifeycle.
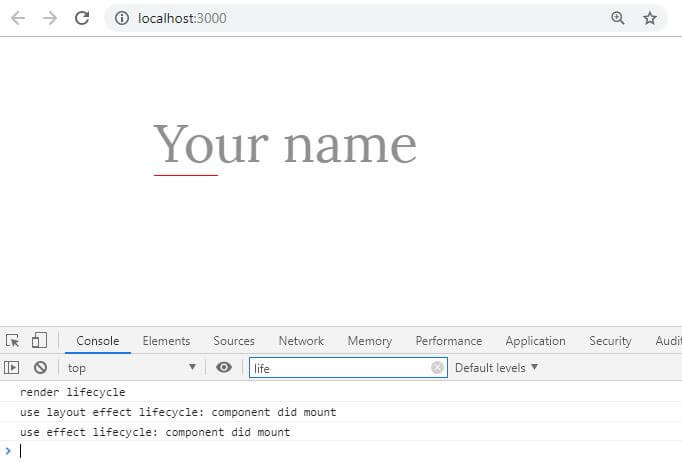
If we take a look at the result above, we can see that anything in the return statement gets executed first, aka the render cycle.
The next hook that gets executed is the useLayoutEffect hook, right after is the useEffect hook.
The real question is, why should we use this if it’s almost the same thing?
useLayoutEffect is identical to useEffect, but it’s major key difference is that it gets triggered synchronously after all DOM mutation.
You only want to use this hook when you need to do any DOM changes directly.
This hook is optimized, to allow the engineer to make changes to a DOM node directly before the browser has a chance to paint.
Now that you know when to use the useLayoutEffect hook, let’s look at another React hook that allows to access a DOM node the React way.
When and how to React to use useRef
In plain JavaScript you had to use getElementById or querySelector to select a DOM node.
But this is not an ideal solution in React.
In React you want to use the useRef hook or if you’re in a React class component, you want to use createRef.
The reason you don’t want to use getElementById or querySelector is because you may be designing your React app to output multiple of the same ID’s, which is a no no.
Another reason to use useRef is because it helps with the unidirectional (single direction) data flow.
You can define a node reference in a parent component and toss them down to child components.
Hence the single direction data flow.
Since our talk is about some of the React hook API, I’m going to use the useRef method.
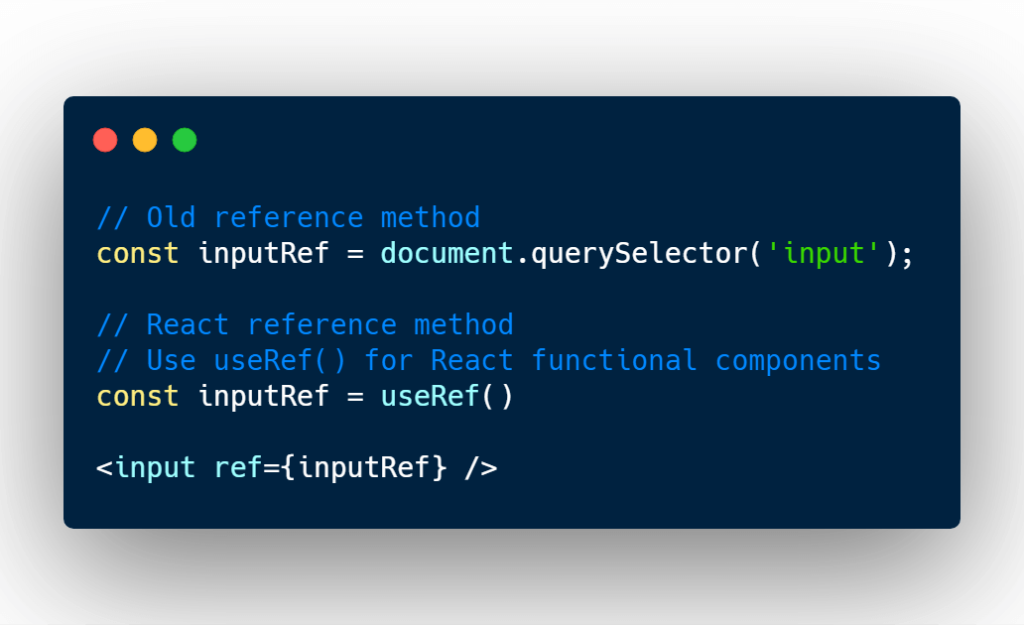
// Old reference method
const inputRef = document.querySelector('input');

// React reference method
// Use useRef() for React functional components
const inputRef = useRef();

<input ref={inputRef} />
Essentially, useRef is a hook function that gets assigned to a variable, inputRef, and then attached to an attribute called ref inside the HTML element you want to reference.
Pretty easy right?
React will than give you a an object with a property called current.
The value of current is an object that represents the DOM node you’ve selected to reference.
You should avoid using reference calls as much as possible. There are only 3 good reasons why you’d need to use the useRef hook.
- Managing focus, text selection, or media playback
- Triggering imperative animations
- Integrating with third-party DOM libraries
Let’s create some code that can do something cool with hook functions that we’ve covered.
I’m goin to create an input field that has a label and a border that the width is 10% of the total width of the input field.
The label is going to mimic itself as a placeholder.
The goal is to make the label animate up and shrink, and make the border line to go 100% width when a user clicks on the input field.
This will require us to make changes to the DOM directly.
Using React useRef and React useLayoutEffect together
Now that you know when and how to use the hook functions, let’s put together the code challenge.
First I’ll create a CSS filed named App.module.css.

html {
  font-family: 'Lora', serif;
}

.label {
  display: block;
  border: none;
  font-size: 48px;
  position: absolute;
  bottom: 0;
  left: 0;
  font-weight: 300;
  color: #8F8F8F;
  z-index: -1;
  transition: all 0.2s ease;
}

.active .label {
  font-weight: 300;
  color: #8F8F8F;
  font-size: 22px;
  transform: translateY(-55px);
}

.input:focus {
  outline: 0;
}

.input {
  font-size: 48px;
  font-weight: 300;
  border-radius: 2px;
  padding-left: 2px;
  border: none;
  width: 80%;
  background: rgba(0, 0, 0, 0);
  overflow-x: hidden;
}

.container {
  display: flex;
  justify-content: center;
  max-width: 960px;
  padding: 60px 30px;
  margin: auto;
}

.inputGroup {
  display: flex;
  flex-flow: wrap row;
  position: relative;
}

.inputGroup label,
.inputGroup input {
  flex: 0 0 100%;
  max-width: 100%;
}

.border {
  border-bottom: 1px solid red;
  width: 10%;
  transition: width .2s ease;
}

.active .border {
  width: 100%;
}
Pretty simple, and basic CSS code. The thing to keep an eye on is the .active class.
That is the class that is responsible for changing the position and the size of the label, and the width of the border of the input field.
Now I’ll create the React component next.
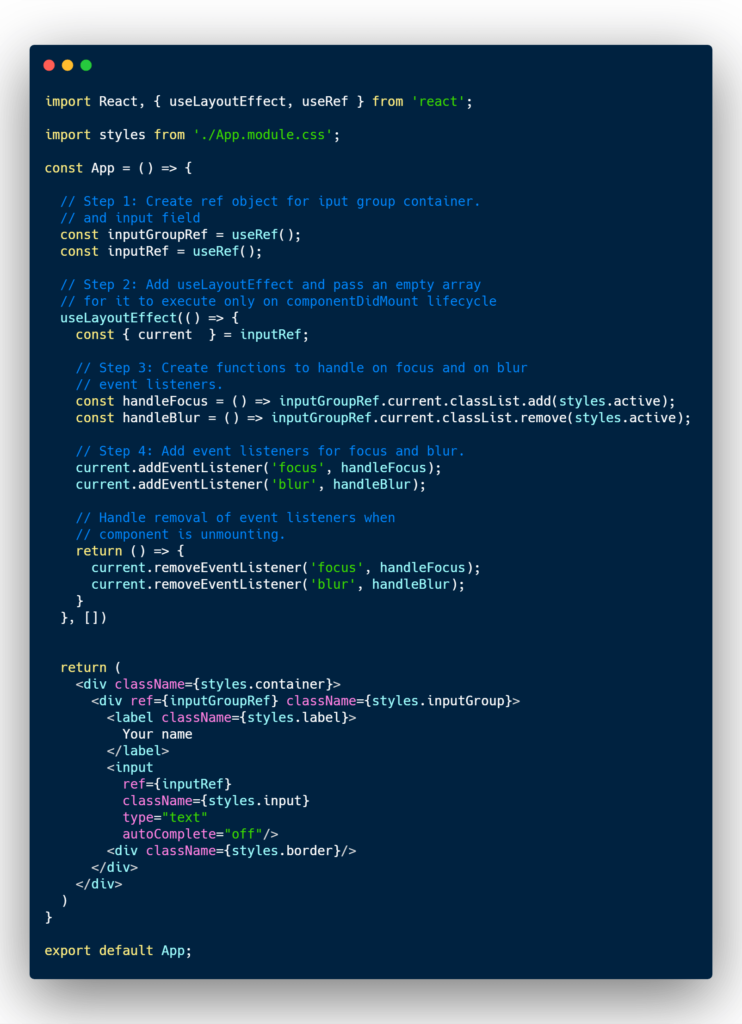
Very basic and easy steps.
The first step is to to create the DOM node references for the group div element and the input field element.
The div element with a class name of inputGroup is going to be the element that receives the .active class name.
Second step is to create the handler functions for the blur, and focus event.
In the focus event, a class named .active will be added to the inputGroupRef node reference.
In the blur event, the class named .active will be removed from the inputGroupRef node reference.
In step 3, I’m adding the event listeners and attaching the handler functions with it.
Step 4 is the clean up process. I’m removing all the event listeners from memory when the React component goes through the componentWillUnmount lifecycle.
In case you want to see the code go to this link. Github Source.
Conclusion
99% of the time you’re going to want to use the useEffect hook, and the useState hook to manipulate the output of a React component.
But in certain cases you need make changes directly to a DOM node.
In case you need to, follow these 2 rule of thumbs:
- Use useRef if you need to manage focus, text selection, trigger imperative animations or integrating third-party libraries.
- Use the useLayoutEffect when ever you need to use useRef.
If you’re interested in learning more about React useState, check out this article learn more about it: What and how to use React.useState().
Oh wow, you’ve made it this far! If you enjoyed this article perhaps like or retweet the thread on Twitter:
I like to tweet about React and post helpful code snippets. Follow me there if you would like some too!
