

4 React conditional rendering methods with props and state
Rendering a component is easy.
But what if you want to render a specific HTML element or React component depending on a prop or state value?

In this article I will cover a few techniques to add conditional rendering to your React render method.
NOTICE
In this article I will be using React state and props, and their new hook API.
If you’re not familiar with React state, props or their hooks please hop on over to the links listed below to get caught up.
React render conditional 1#: Inline If with logical operator
// Inline If with logical operator is  a
// combination of "&&" and "||"
const SampleComponent = () => {
  // Show message state
  const [yellAtPerson] = React.useState(false);

  return <div>{(yellAtPerson && <h1>AAAAHHHHHH</h1>) || "Hi there!"}</div>;
};
This is one of my favorite methods to add conditional logic inside the render method.
It’s clean, and short.
I’ve created a state variable called yellAtPerson with a default value of false.
In the render method I’m adding a condition to check if I need to yell at the person or not.
You might have notice 2 odd looking symbols, && and ||.
This is a normal JavaScript expression.
When you’re using &&, you actually need to have one evaluation on the left side and the output on the right side.
e.g. – 3 > 1 && console.log(''3 is greater than 1")
This is equivalent to
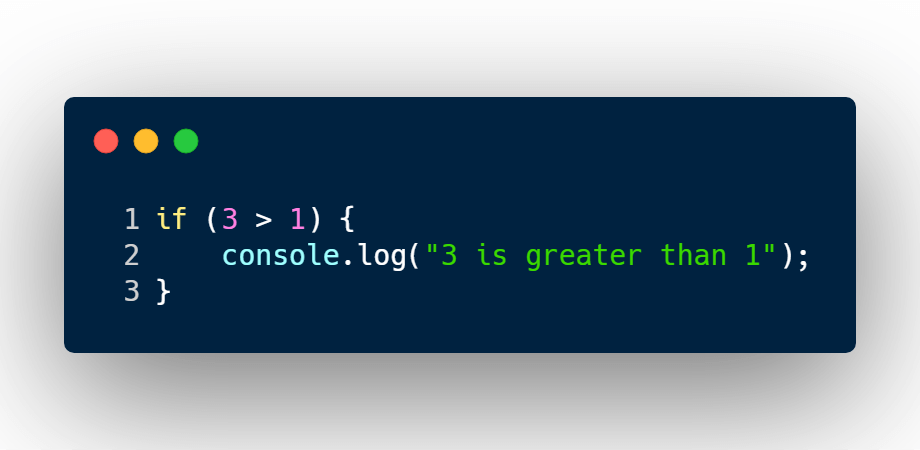
if (3 > 1) {
  console.log("3 is greater than 1");
}
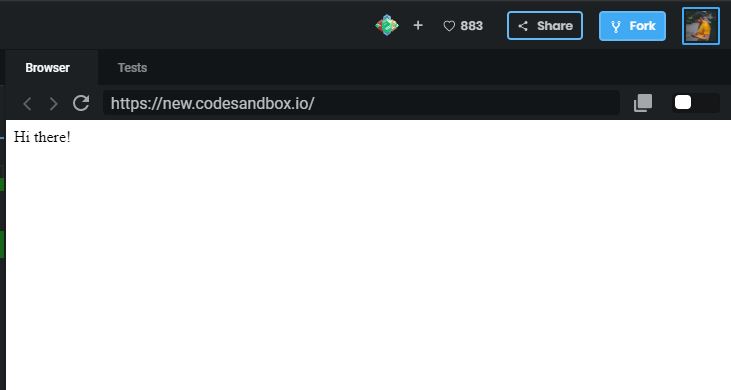
Back to the React example, yellAtPerson is false.
So I do not yell at the person, and than the || statement gets executed.
|| is short for or. That’s the else in a if-else condition.
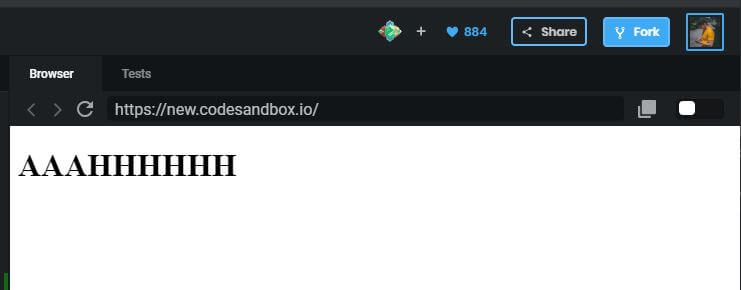
Let’s yell at a person now.
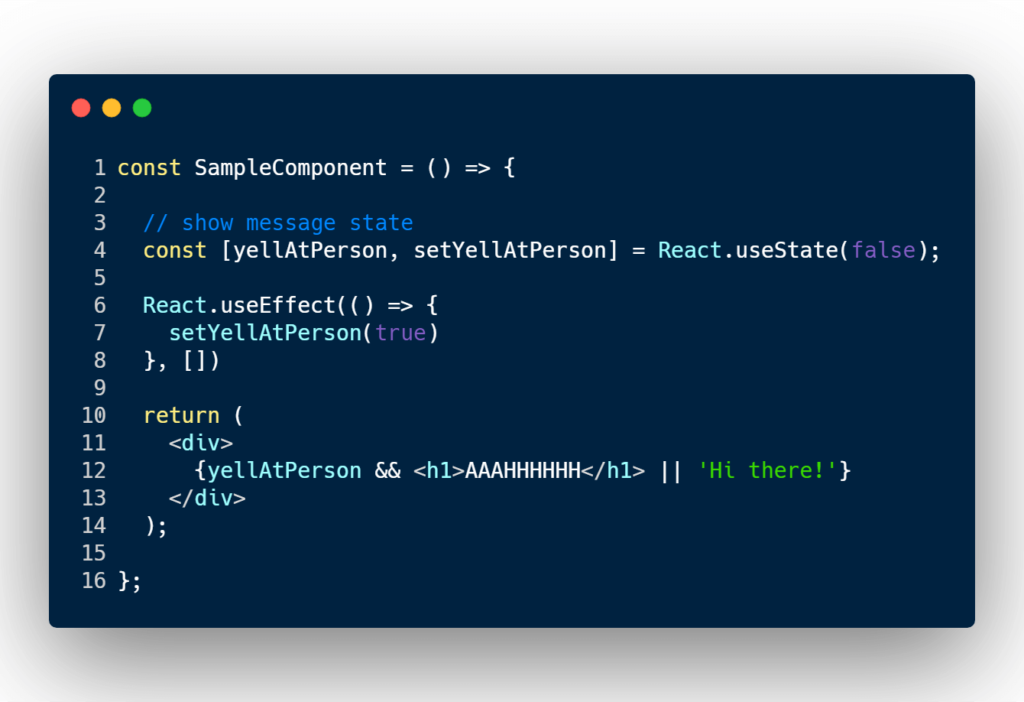
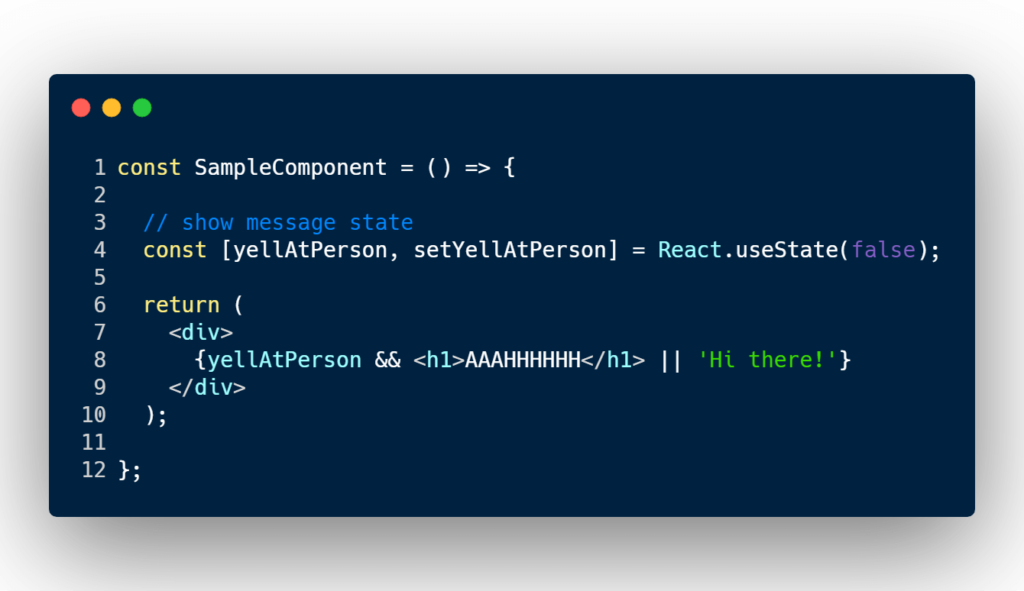
const SampleComponent = () => {
  // Show message state
  const [yellAtPerson, setYellAtPerson] = React.useState(false);

  React.useEffect(() => {
    setYellAtPerson(true);
  }, []);

  return <div>{(yellAtPerson && <h1>AAAAHHHHHH</h1>) || "Hi there!"}</div>;
};
In the SampleComponent, I’m using React useEffect to trigger only on componentDidMount.
And inside the hook function I’m setting yellAtPerson to true.
React render conditional #2: Inline if-else with conditional operator
Another method is to use the short-hand version of an if-else statement.
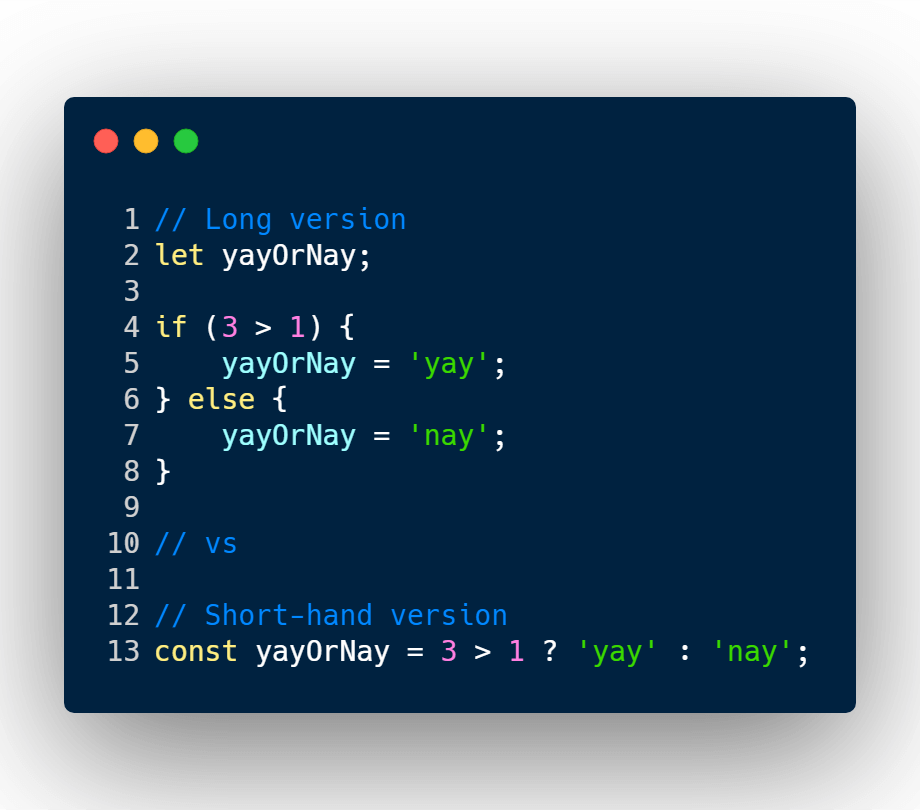
// Long version
let yayOrNay;
if (3 > 1) {
  yayOrNay = 'yay';
} else {
  yayOrNay = 'nay';
}

// short-hand version
const yayOrNay = 3 > 1 ? 'yay' : 'nay';
This looks great, let’s plug into a React component.
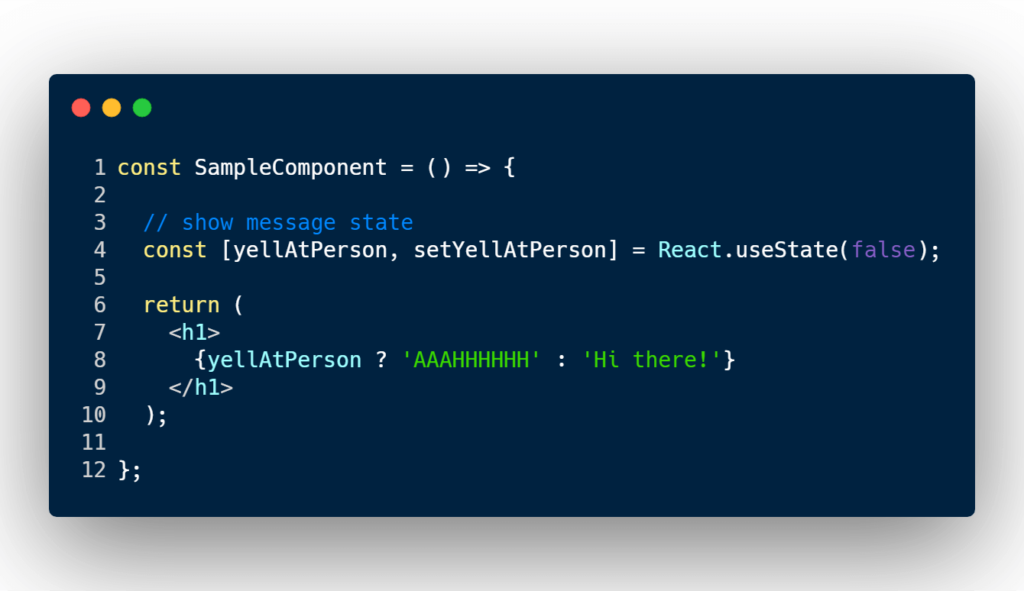
const SampleComponent = () => {
  // Show message state
  const [yellAtPerson] = React.useState(false);

  return <h1>{yellAtPerson ? "AAAAHHHH" : "Hi there!"}</h1>;
};
You may also add more HTML or React components by wrapping parenthesis around them.
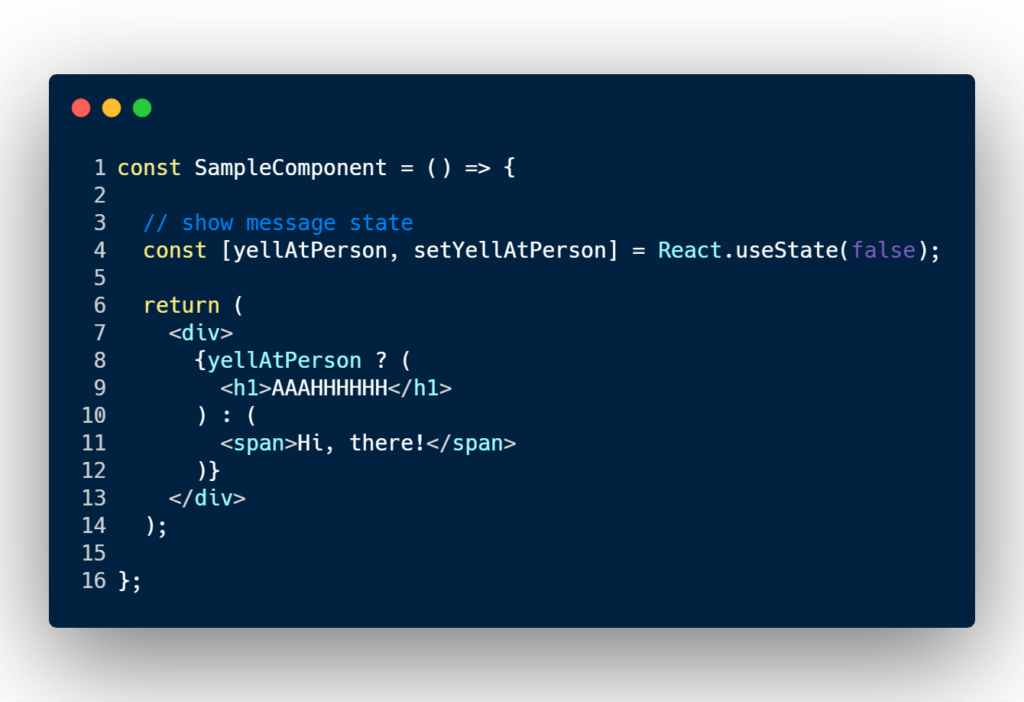
const SampleComponent = () => {
  // Show message state
  const [yellAtPerson] = React.useState(false);

  return (
    <div>
      {yellAtPerson ? (
        <h1>AAAAHHHH</h1>
      ) : (
        <span>Hi, there!</span>
      )}
    </div>
  );
};
This style might get a bit too clutter and messy to read.
But it’s up to you to decide what is a readable, and appropriate style to use for you and your team.
React render conditional 3#: If-Else statement
I’ve been doing a lot of talk about how to write short-hand versions of an if-else statement, but what if you want to use a regular if-else statement syntax?
Great news, you can!
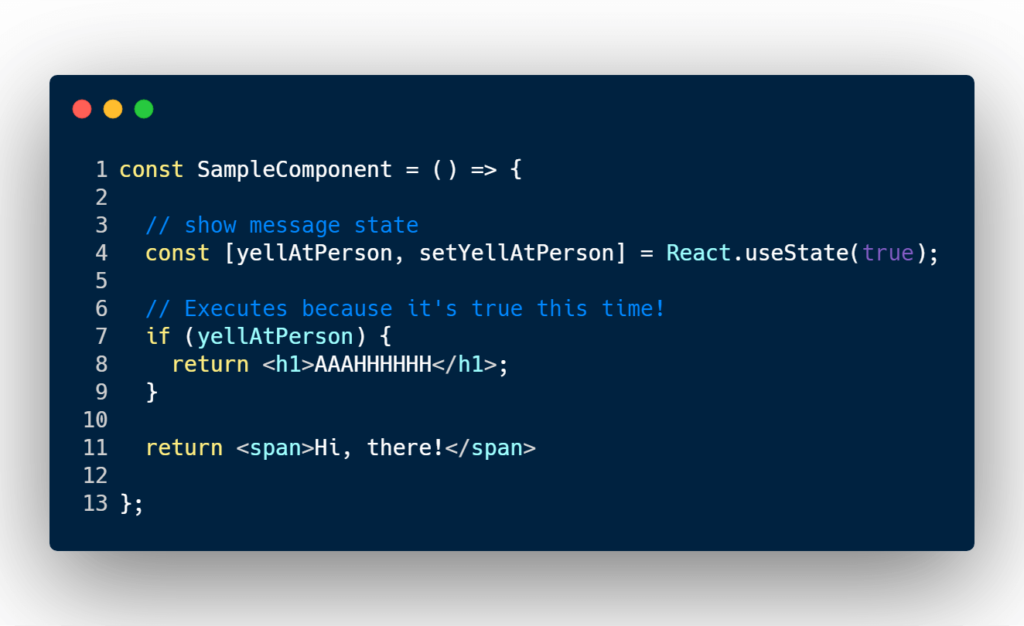
const SampleComponent = () => {
  // Show message state
  const [yellAtPerson] = React.useState(true);

  // Executes be the value is "true"
  if (yellAtPerson) {
    return <h1>AAAAHHHH</h1>;
  }

  return <span>Hi, there!</span>;
};
React render conditional 4# : React Component returning null
Another example of preventing a React component to render is to have it return null.
This is mostly useful for drop-down menus, or modals.
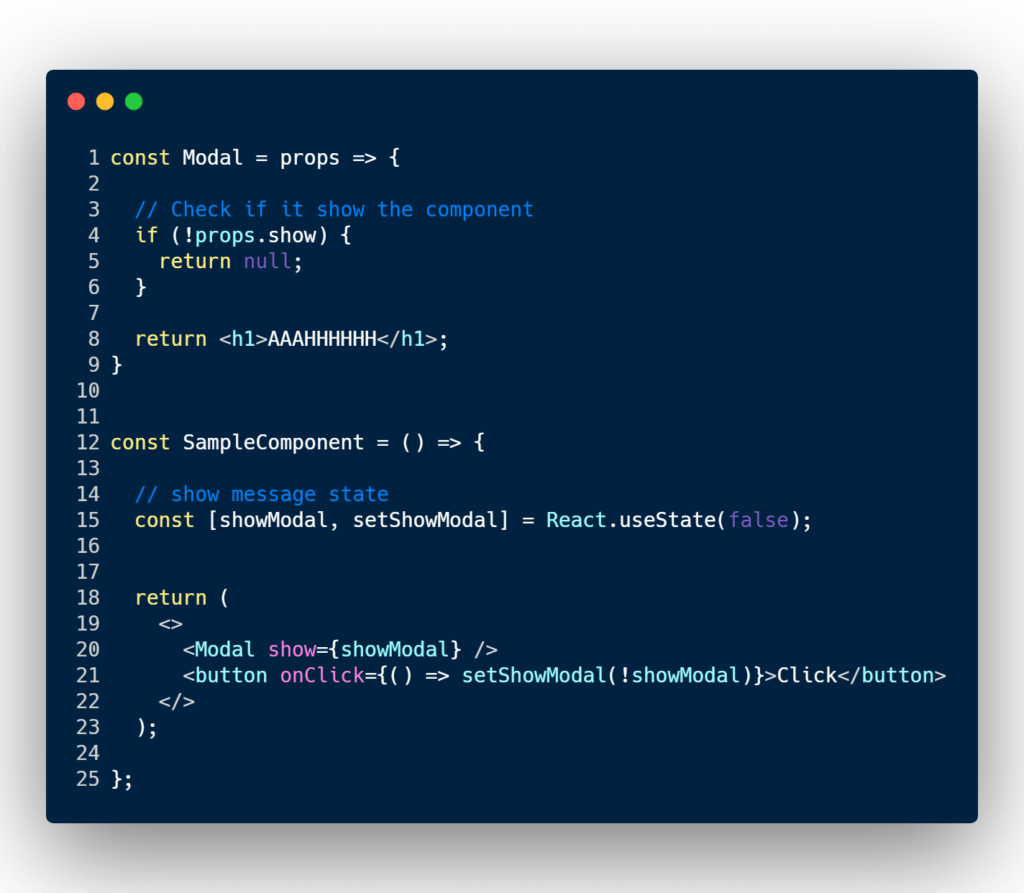
const Modal = props => {

  if (!props.show) {
    return null;
  }

  return <h1>AAAHHHHHH</h1>;
};

const SampleComponent = () => {
  const [showModal, setShowModal] = React.useState(false);

  return (
    <>
      <Modal show={showModal}/>
      <button onClick={() => setShowModal(!showModal)}>Click</button>
    </>
  );
}
In the example above, I’ve created a new React component called Modal.
The Modal component will check if it needs to display the H1 element or not.
I’m using the Modal component inside my SampleComponent, and I’m passing my state variable showModal, as a property.
I’ve also added a button with a click handler. The handler function will toggle on/off the value of showModal.
This will cause a toggle effect in our React application.
Conclusion
You might be asking yourself, which is the best way to write conditions inside the React render method.
In my humble opinion, there is no correct way or best method.
Pick the one that is the most readable for you and your team for that specific use-case.
There have been plenty of projects I’ve jumped into where, the app is using all the methods available in 1 React component.
But the code was readable and clear, so it didn’t cause any issues.
If you’re curious how to conditionally add attributes to a React Component go here, “Conditionally adding props to React Components“.
I like to tweet about React and post helpful code snippets. Follow me there if you would like some too!
