

A guide to navigating with Next JS links

Your Next.JS application may have multiple pages, but now you’re wondering, how do I let a user navigate to my other pages?
You could use an HTML <a /> tag for that.
However, that would make a request to the server and would cause the browser to refresh for the new content.
If your goal is to use client-side navigation, than you must use Next.JS Link component to support client-side navigation.
Let me show you how to use it.
How to add NextJS link navigation
Adding client side navigation to your Next.JS application is extremely simple.

import Link from "next/link";

const App = () => (
  <div>
    Hello World.{" "}
    <Link href="/about">
      <a>About</a>
    </Link>
  </div>
);
I’m importing the Link component from next/link library.
And I’m passing an href property to the Link component with a value that leads to the about page.
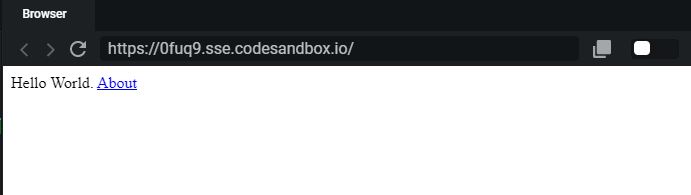
Here’s the output.
The action to this link happens in the browser, without making request to the server.
How to handle onClick with Next JS links
Sometimes you’ll want to add a click event to the link element. You might think that passing the onClick property onto the Next Link component will work. But it doesn’t!
If you’d like to add a click event handler to your link, you’ll want to attach it to the HTML child element inside the Next Link component.
In the example below, I’m using the <a> tag element.

import Link from "next/link";

const App = () => (
  <div>
    Hello World.{" "}
    <Link href="/about">
      <a onClick={() => console.log("clicked")}>About</a>
    </Link>
  </div>
);
Did you notice that I’ve added the onClick property to the HTML link element, and not the Next Link component.
The child element doesn’t have to be an <a> tag. It may be any other valid, native HTML element.
How to add query params to Next.JS link
Passing queries to a page is extremely helpful when the page template can handle dynamic data.
Passing queries to the next route navigation is really simple.

import Link from "next/link";

const App = () => (
  <div>
    Hello World.{" "}
    <Link
      href={{
        pathname: "/about",
        query: { name: "Ruben" }
      }}
    >
      <a>About</a>
    </Link>
  </div>
);
Instead of passing a string to the href property you may pass an object.
That object will need the pathname value that points the route/page you want to send the user to.
The next property to pass in the object is the query key. The query key is a key value object.
The keys represent the param names, and the value will the param value.
How to prefetch pages with Next JS links
Pre-fetching, also known as pre-rendering, can be a very useful technique to give the user a better, and faster experience.
In a nutshell, prefetching will load the next resources (code) to be executed as soon as the user navigates to the next page.
This will save some time of having to wait to load the resources when the user navigates to the new page.
Next.JS makes it easy for us to use this technique by passing the prefetch property to the Link element.

<Link href="/about" prefetch>
  <a>About</a>
</Link>
In the example above, this lets the app know to start fetching only the resources that creates the about page.
Addy Osmani wrote a great article on how prefetching works, and how it helps. Check that out if you’re interested.
How to add active classname to Next JS link
Adding an active class name to a Next.JS Link component is a bit complicated, but doable.
To achieve this goal, you’ll need to create a new React component that handles this logic.
Let’s take a look at the example below.

import { Children, cloneElement } from "react";
import { withRouter } from "next/router";
import Link from "next/link";

const LinkElement = withRouter(
  ({ activeClassName, children, router, ...props }) => {
    const child = Children.only(children);

    let className = child.props.className || "";
    const linkPathname = typeof props.href === "string" ? props.href : props.href.pathname || null;

    if (router.pathname === linkPathname && activeClassName) {
      className += ` ${activeClassName}`.trim();
    }

    return <Link {...props}>{cloneElement(child, { className })}</Link>;
  }
);
In the example above, I’ve created a new React component named, LinkElement. You may add this component inside your components directory.
Its main job is to run a conditional to check if props.href matches the React router pathname value.
I achieved this by wrapping the withRouter() HOC (higher order component) onto my new LinkElement component.
By using withRouter(), it will add a new property to the props object called, router.
The router property will have the data of what active path the user is currently on.
Now that the new link component has been created, you can import that custom React component instead of the Next Link component.
Here are other Next.JS articles that you might enjoy:
- How to access getInitialProps with a class or function component in NextJS
- How to deploy a Next.js app with docker on Zeit now 2
I like to tweet about NextJS and post helpful code snippets. Follow me there if you would like some too!
